Showing posts with label crafts. Show all posts

Burlap no sew curtains

BURLAP  NO SEW CURTAINS:
My burlap ran me about $1.98 a yard.
I bought 5 yards because I always go over board like that.

These curtains were inspired by my moma.

Cut your burlap to the length you like- add about 2 feet to roll up, if you're going for that look.
Fringe the edges so you don't have that- I just cut that look.
Cut the string. I bought the expensive 10 cents a yard kind.
I'm not even telling you how many yards of that I bought! :)
Remember you have to double the string or ribbon that you get.


The gold clips are a pain to sqeeze but you can do it!
As you can see, I went with the gold rod and hooks - they were the cheapest.
I didn't want to spend a great deal on something that could end up in the garbage.

Lay string down, then material, roll up bottom, then bring string up to meet top. At this point burlap material should be sandwiched in between strings.
Clip together and hang.
                                                     
Waaalaaa, just made the cheapest curtain known to man.

These curtain work for me.
 I'm pretty casual and so is my home.
If you're all fancy smancy, I'd probably opt for something else
-but I love them on the door.
I may try some in the dining room next week.
 After all, it's about to be painted beach blue.

P.S I did the dining room. Love it.


-mandy

*FUN* easy *SIMPLE* Appetizer or dessert tray

Hello clearance items- I appreciate you!

This cute finger food tray took me all of 5 minutes to make!
Seriously, a nap-time project.
I had these plates from Tarjay I found on clearance.
I've been waiting to do something with them.
Then while at Lowes, I spotted yellow tag stickers on the planters. Just the colors I like!
Grab some heavy duty glue and wall-a.
I just made the cutest finger food tray!
Less than $5! that even makes it better...
happy crafting y'all!


The white planter is what I used for the Teacher bouquet. Lowes marked down $1.30.

-mandy


Revamp revamp side tables

I painted these lovely side tables black then a light gray top.
 Added some different size chevron pattern
 Sanded it down and added a light covered  antique white wash.
 Put it on wipe it off.
 Then stenciled this fancy pants pattern on top to match my coffee table revamp!
 We keep my son some extra clothes and socks down here for when were in a hurry and my hubs hates running up and down the stairs! :)

I love it!
It's cute, unique and so me!
-mandy

cork board flair-

Before... 2 regular cork boards
Paint these bad boys up!
 ...and wall-a!
 I free handed first with a pencil
 Now ready to use!
P.S.I need a new camera- and maybe a new operator as well! :)


-mandy

revamped coffee table

BEFORE...

AFTER...


-mandy

Starfish painting


I made this painting before I started my blog.
So, I didn't make any pictures of the process but it's fairly easy.

Hobby Lobby has sales on the canvas frequently and I'll always pick a few of different sizes up.

Pick a few colors you love!
Let the colors dry in between coats.
Streak colors on going in one direction.

If you want to blend colors together apply next color while still tacky.

Buy a bottle of mineral texture medium.
I drew the outline of a starfish on my canvas with a pencil then applied texture heavily. 


After it has set but still tacky use something small and pointy and push pin work for me and poke tiny holes in the starfish for detail.

Let dry a few days. 
Then apply a gloss to seal! 

-mandy

Teacher bouquet!

So last year my daughter had the most awesome 3rd grade teacher! The year literally flew by! We always do end of the year gifts and you all know by now that my strongest gift is procrastination. So, I ended up sick the last week of school which lead me to be at the doctors’ office on the last day and missed the award ceremony. I was bummed. If I were like the other 5 million moms then I’m sure I would have already had a gift and been prepared for the week but it just aint happening. J So all summer it was driving me nuts that we never gave her anything. Well, this morning my daughter took this O, so cute arrangement I came up with just for her 3rd grade teacher.

Everything is useable.
                     

How to do it:

Glue assorted flowers to Pens and pencil
I grabbed a few of these vases at Lowes a few weeks back with they were a steal!
Load the vase up with candy. I used mints and taffy
Stickers as filler-


The rest is up to you!

 Be creative- have fun!

This would be cute for a hairdresser -using brushes and combs! Just a thought!
-mandy

Beach Style chalk board

As you can tell I've been on a chalk freanzy... 

Chalk Board T.V trays-

The old ones...


...and the transformation-

 My daughter loves these!
She wrote my name all pretty.

What you need:
2 old preferably stained up and scratched TV trays
(I used my other two and did a picture top)

Spray paint to cover the old TV Trays.
 I used black.

 1 small can of chalk paint (Lowes)
or make your own in any color- I was lazy that day and bought mine!
http://craftathome.com/Instructional/chalkboardpaint.html

I suggest using a small foam roller so you have a smooth surface to write on and it's not rigid like mine. :)


-mandy

Dollar tree door arrangement


Dollar Tree door arrangement:


Total price $13 + tax.
So, I've wanted an arrangement for my front door, since we moved in. I was browsing in one of our craft stores and decided I was going to make one. Ahh, my hubby happen to be with me, why we're we in the craft store together, I have no idea. It was a disaster. I should've seen it coming. So we left. End of story didn't buy anything.
Last week we were in the famous "Dollar Tree".
I love that store. It's fun.
I bought lots of flowers. Some tall for depth, some small, small big but a variety of all sizes. By this time everyone that had came with me was ready to walk home. I was being picky and it was taking a long time, to them.


The basket, yes also at the dollar tree where everything’s only a $1.00.
It was originally green but I'm more of a teal gal.
 So, I spray painted (already had some in garage from previous failures of projects) it lightly,
   some green could still be seen.
 Don't forget the foam to stick your flowers in. Yep, at the dollar tree.  
That's my Bella and Edward cup in the background-just thought I'd point that out.
It has nothing to do with the dollar tree or flowers.

Finished product. Not to shabby for $13 bucks.
It was dark. I do not claim to be a photographer.

Pretty
It is now daylight.

-mandy

Old turned new-

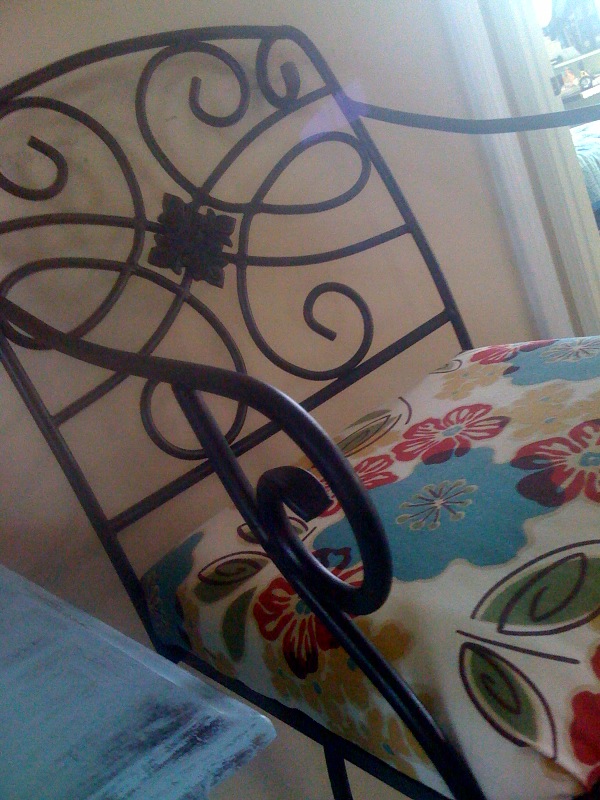
Old rusty bar stools

I had these bar stools that got stuck in the back yard when we moved. They were gross.
I don't have a before picture-like I said they were gross.
SPRAY-PAINT is my friend. I like it a lot. It comes in fun colors.
I chose black. I would like to stay married. Although, the neon pink was a passing thought.


If you don't have an old rusty one of these, go find one.
You can normally find awful things at garage sales to turn into a little treasure.
My best gal, Staci found the material and brought me by a swatch. Just cus. I liked it after looking at it on the cluttered bread box that I don't put bread in. It inspired me to get those awful bar stools out of the back yard. Thanks Staci!


-mandy

My Blue Room-

My blue dining room is complete! Well, at least with the painting stage of it. The T.V trays are being worked on and I have something awesome in mind for a dining room table. All in due time. I had on my "list" to paint this dining room since we moved into our house in September. All of my friends have endured the dreaded "what color do you like" question and all the paint samlpes scatterd everywhere. I even painted a sample section of the wall coral. My hubby said it was pink. Blue/teal is the new color! Finally a project completed!


Dining room painted

Much like many days of mine- the day I decided to paint for some reason, I decided while I had the paint out I'd take care of some other projects- Didn't work. I didn't complete none of them. What I did succeed in that day was overwhelmingness that I put on my own platter. Yes, I upgraded to a platter that day. My plate was to small.

Lesson well learned. Do a few things right, well and enjoyable or do so many things you can't focus an any one of them and it turns out awful!


I was in the taping segment of this movie as I was getting ready to wet the paint brush I realized I had taped the dadgum wrong side. Well, that would've looked just plain stupid and I would have never heard the end of that painting story. The fact is, as I was taping I never thought about taping at all! It was totally not my focus! I was thinking how I needed to get Cole in the bath, fix his milk, what color would look good in the bathroom, making my list of groceries and school supplies in my head.

Once I gave Cole a bath, spent time with him, gave him his milk, tucked him in, quit planning for tomorrow and focused on my job at hand, it was much more enjoyable!


Yes I enjoyed painting at 2am. It was quit. It was amazing!

I realized, I have a bad mind set of- hurrying up to finish what I'm doing so I can hurry up and finish the next thing- I never enjoy much of what I’m actually doing because my focus is what’s next.


Despite the few spills and yells of, “hurry up and bring me a rag”, it went well.
Once I got my priority straight!
 I’m not a professional but the room is to my liking-

This made me be more aware of my devotion time. You do it because it's habit but are we really listening?
- think about that for awhile-
Ouch


T.V trays adventure...

First of all I've had these light wood T.V trays for years. You know the ones with the white water rings and other unknown spots. I'm thinking they might've been a wedding gift 12 years ago. So I decided to get the paint out. Didn't like the first go of it so we bought Mr. handy dandy spray can in black. My teal basket magically turned black, so I figured black T.V trays would be fitting. By The way I'm wearing an apron and was multitasking. Dinner was cooking inside and brownies were in the oven.

I used some scrap-booking techniques and walla- awesome T.V trays. Well - I love it! This one is my daughter. I'll do the next one of my son. Then the other two will be chalk board tops for homework. Cool-

…and yes I burnt my thumb a few times because I wasn’t patient! Go figure-


I like the burnt edges so that's how I did mine. I used newspaper as my base (from all my Sunday coupons). You could just cut paper to line up with the top of the tray but make sure it's exact and very clean cuts. Once the Mod Podge is on there's no cutting. Wallpaper is awesome and super easy on top too!


I burnt the edges of the pictures with some scrapbook paper and my thumb. Placed and coated! I've applied 4 coats so far because the pictures are thicker and I want a smooth surface on top.


 The Mod Podge doens't ruin the pictures. Just apply brush and leave it alone.


-mandy
Popular Posts